For example, you have the ability to make wholesale purchases in your Magento ® store, but a customer can be aware of it only after reading the general information or consulting your specialist. It is not convenient for a customer because all the necessary information should be shown in such a way that it attracts your customers’ attention. The blocks are used for this purpose.
A static block can be mapped with any information starting from the working hours of Magento ® store on the main page and ending with the explanation about the refund of the products bought in Magento ® store.
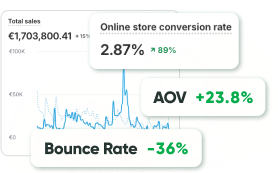
Static blocks allow you the ability to manipulate displayed HTML attributes throughout your project. Examples could include but not be limited to sales, seasonal banners, return or refund processes and size charts.
Step by step Magento Website Development instruction
- If you are using a standard theme for Magento ®, you need to find the file catalog.xml. It is located on the following path: the admin panel or the hosting files /app/design/frontend/default/default/layout/wishlist;
- Then the catalogs are created. We follow the path /app/design/frontend/default, create the folder called “Your theme” and then the folder called “layout”. You should get this path as a result: /app/design/frontend/default/Your_theme/layout/;
- Then you should go back to catalog.xml file and copy everything from this file into the “layout” folder created.
It is time to create a static block.
Please, go to the CMS tab in Magento ® admin panel and choose the section called “Static Blocks”. After transferring to this section you will see “Manage Pages” or all the static blocks (pages by default you’re your site.
Click on “Add New Block” and transfer to the menu editing/creating a new block. You should enter the block title in the “Title” line. This title will be for an administrator, customers will not see it. Then you should go to the second line called Identifier. The titles without spaces are usually entered here by default the same as in URL of the site. Then you should show for what purpose the block is going to be applied. You should enter that section in the line “Store View” which will be displayed in the block section. For instance, the link to the category of wholesale purchases.
Remember that “Store View” should be written in the catalog.xml file in order to make the block work correctly. The status will be “Enabled” and you write the HTML code which will be displayed in the block in “Content”. Click on the “Save” button and go back to catalog.xml file.
Please, be careful with the following:
You need to identify your block to the catalog.xml file. You need to open the file for it in an editor and find the tags which control pages.
The code follows:
<block type=”cms/block” name=”Your Text”>
  <action method=”setBlock”><block_id>Your_Text_ID_Block</block_id></action>
</block>
You should save the changes and go to the admin panel: System -> Cache Management and clear Cache. Then you should save the settings and go to the main page. Update it and enjoy the result.
If the block is not displayed, check the area of the code inserting and also if there are any blank spaces in it. In case if you have any issues and development of Magento ® doesn’t work even after the precise checking, we advise you to contact our GoMage experts.