

All store owners of Magento ® know about the usefulness of the tags in Magento ®. If you are not aware of this feature, you should read this article carefully in order to get to know how to approve, add and edit the tags in Magento ®, in other words, how to manage these tags.
Working With Magento Product Tags
The first case is when a customer adds a tag to the frontend and you need to approve it. So, you need to log into your Magento ® admin panel and go to Catalog menu > Tags > Pending Tags. You will see a table with the tags that are waiting for your approval on the page:

You can decide whether you want to approve a tag or disable it. There are two ways for how to do it. The first way is to mark the checkbox which you will find in front of each tag in the table. Please select the status from the Status drop-down menu that will be seen next to it:

Please click on the Submit button in order to save the changes.
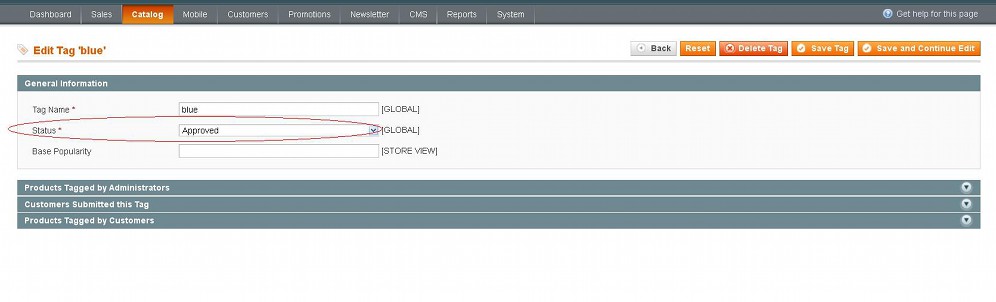
The second way is to change the status by editing the settings of each tag. You need simply to click on the tag row in the table. You will find the General Information panel that contains a drop-down menu Status on the page. You can use it in order to approve or disable tags:
Click on the Save Tag button or the Save and Continue Edit button.
If you want to add a new tag and edit the settings of already existing ones, both approval and pending, you should go to Catalog menu>Tags>All Tags in your Magento ® admin panel. You will find the table with all the tags there.
Here you can do different actions with the tags such as to change the status, delete the tags in Magento ® by marking the checkboxes and using the Actions menu. You can edit a tag by clicking on its row in the table. You can add a new tag using Add New Tag button. When you click on this button, you will see the General Information on the tag.
Tag Name is the field for the name of the tag. The Status drop-down menu is set to Approve by default. You will see also an optional setting called Base Popularity. It is empty by default. And as you know, the tag is more popular when customers have added it to many products, but you can do it easily by using the Base Popularity option. If you enter 5 for one tag in the Base Popularity field and you set up 0 for the other tag in this field, the tag with the higher value will be more popular. It means that this tag will be displayed in the Popular Tags block on the frontend and the name of the tag in Magento ® will be written with bigger letters. When you are ready to save your changes, you need to click on the Save and Continue Edit button.
After this action three more panels with settings will appear:
Products Tagged by Administrators, Customers Submitted this Tag and Products Tagged by Customers:
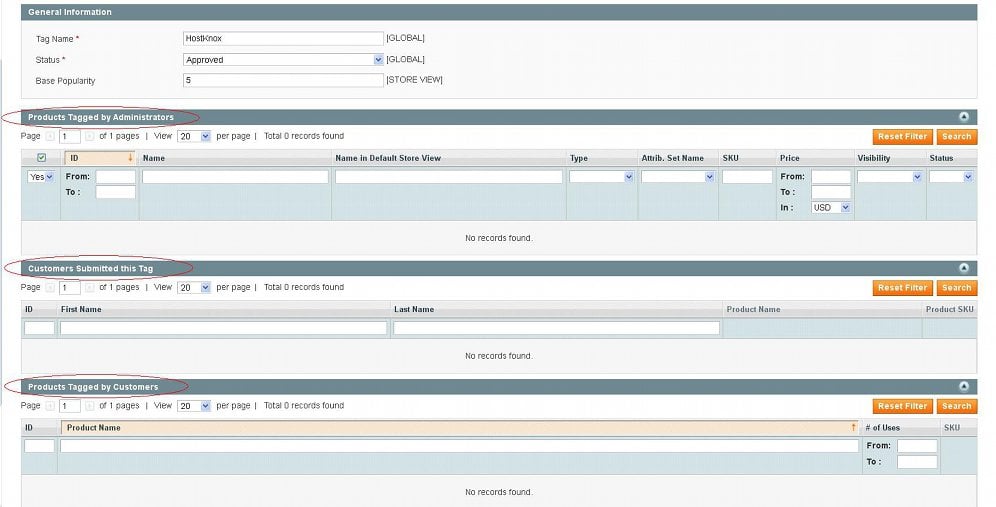
You can expand each panel by clicking on it. From the Products Tagged by Administrators panel, you can associate products with the particular tag. You will see a list of the products in your catalog if you click on the Reset Filter button. Choose the checkboxes of those products that you want to be tagged and click on the Save and Continue Edit button.
The option of panel Customers Submitted this Tag lists the customers, if any, that have added this tag to products. The Products Tagged by Customers panel lists the products that customers have assigned to this tag. The above two panels will show the relevant information even when the tag has been added by you from the admin panel.
Please do not forget to click on the Save Tag or Save and Continue Edit button when all your settings are ready.
If there are multiple views in your store, the tag settings in Magento ® will have an option for choosing the store view:
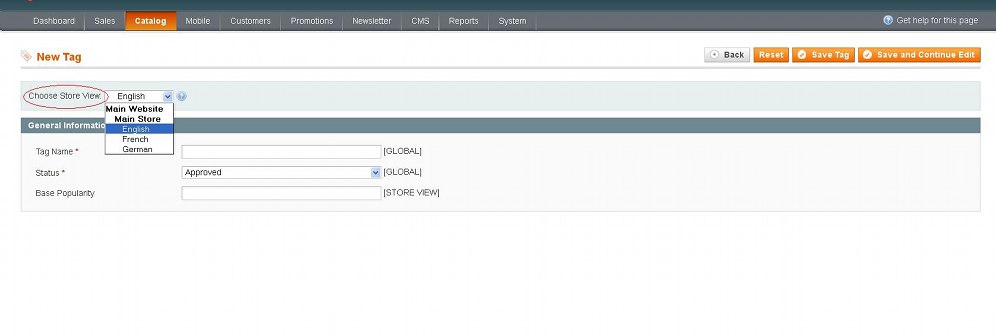
If you want to display your tag for all the store views, you need to add it to each store view.


